By Jennifer Carson
Wool dryer balls are a great alternative to chemical laden dryer sheets and fabric softener. They bounce around in the dryer with your load of laundry, helping to circulate air, which makes your clothes dry faster, reducing the time needed to run your machine. Of course, they work best with small to medium size loads because they need room to move around, but they will help with static cling and soften your clothes, all without the use of chemicals. Energy saving, money saving, and eco-friendly? Who could ask for more? Here’s what you need to get started:
•Wool roving
•One 12” x 12” piece of tulle netting
•Several 1½” to 2” Wood balls. You’ll need one for every dryer ball you want to make. These are optional, but I find the wool dryer balls work better with a little weight to them. You could also use yarn to make a very tightly wound core. If you use a yarn ball core, use wool or cotton yarn—not acrylic.
•A piece of bubble wrap
•Hot water
•Liquid soap—I like to use Dr. Bronner’s Pure Castile Liquid soap from a foam pump.
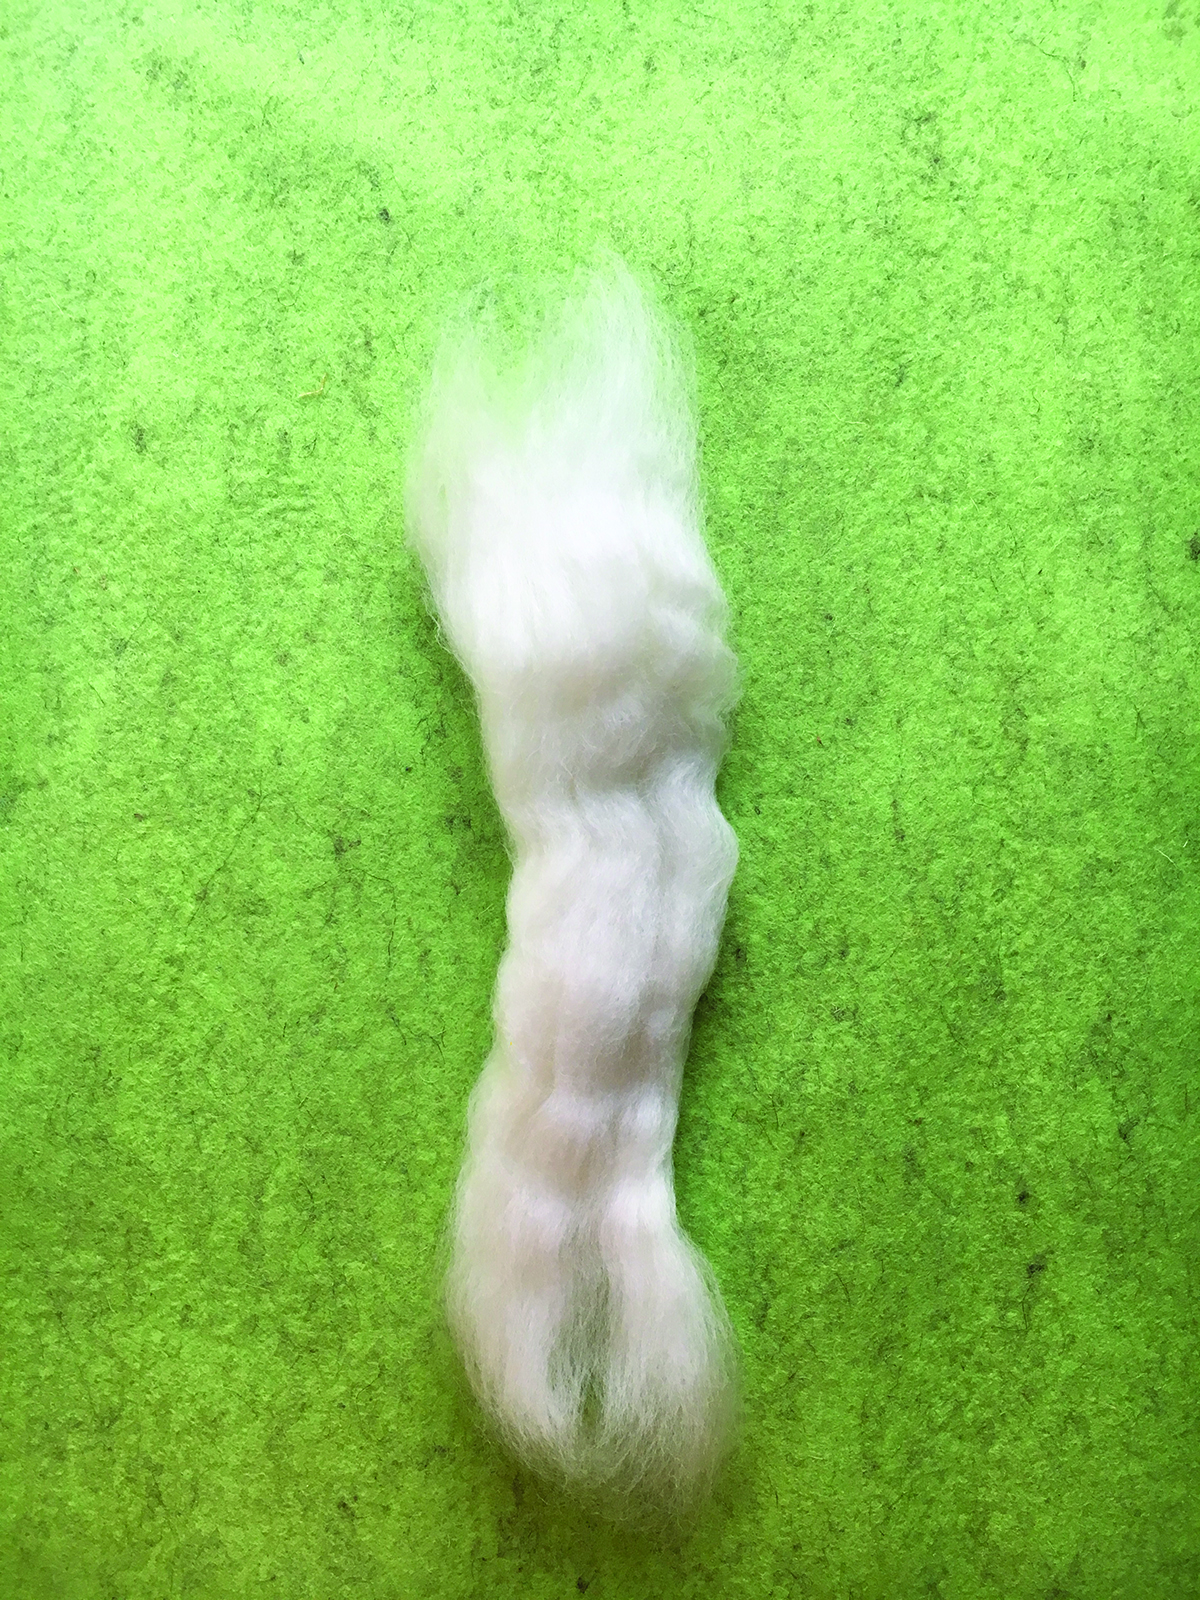
Pull a section of roving about 12” long off the skein—you never want to cut roving with scissors.
From that 12” section, pull off smaller strips, about ½” wide.
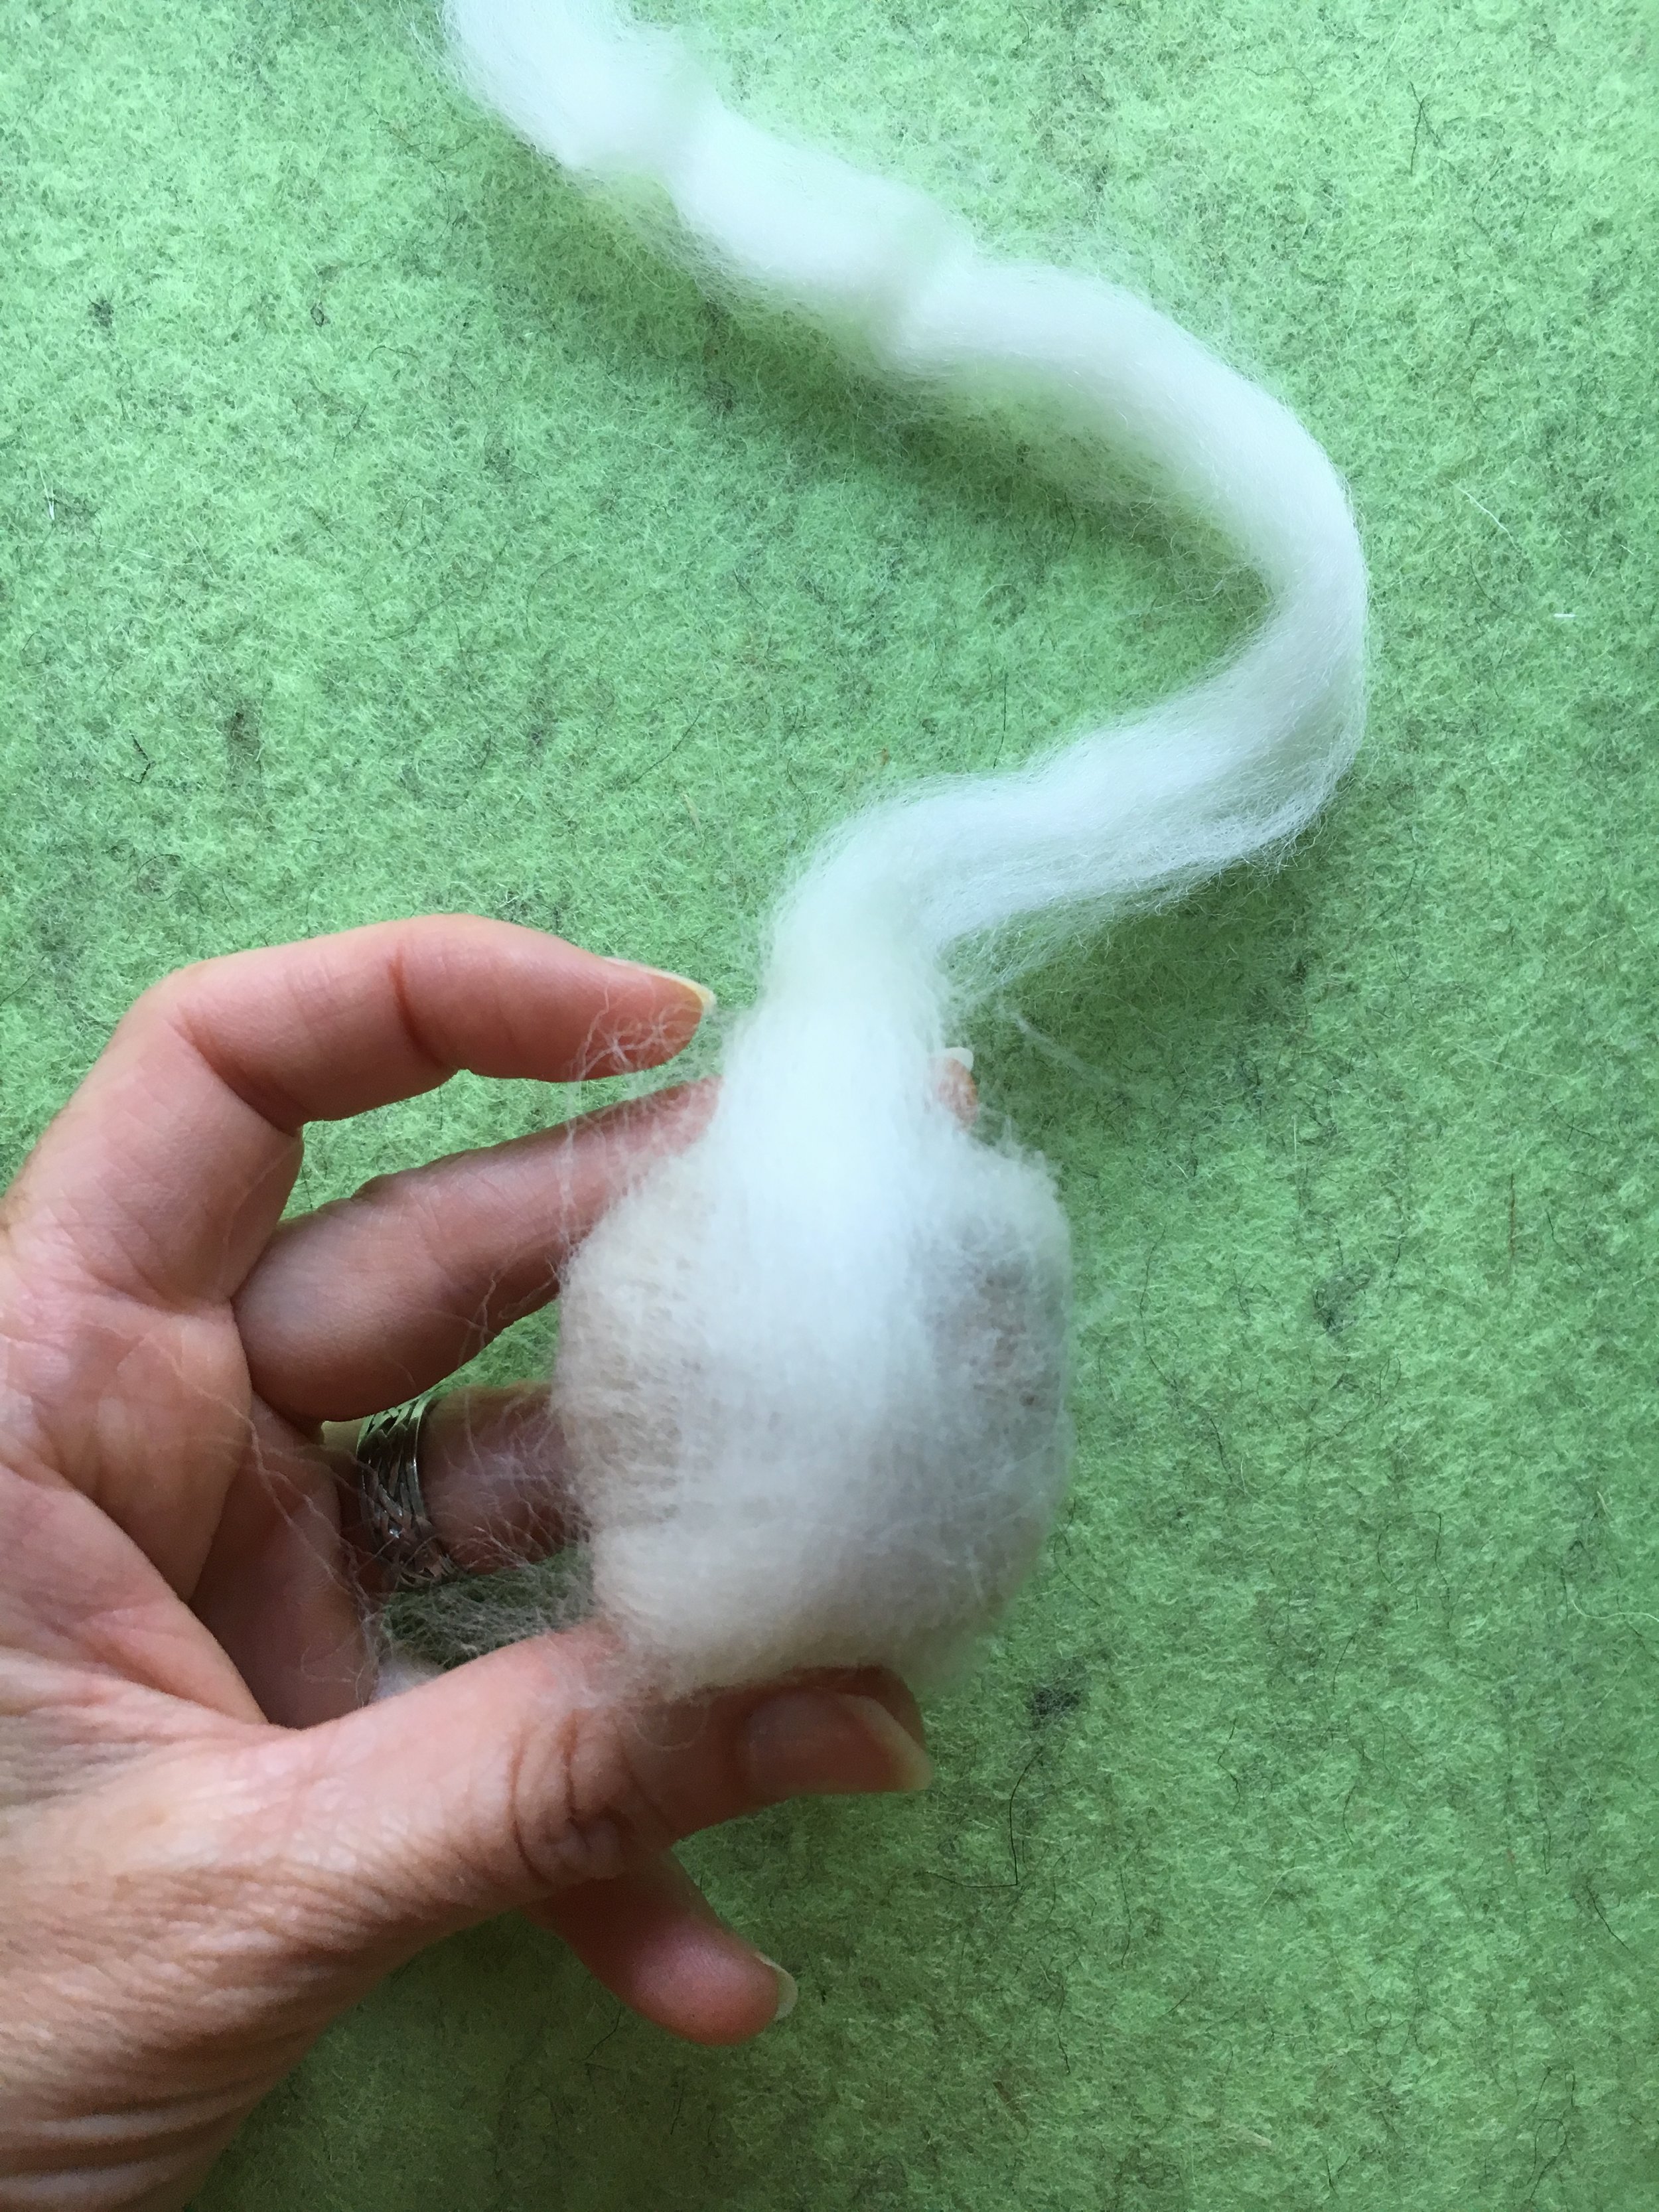
Take one of the smaller strips and wind it around your wood ball or yarn ball core. Be sure that when you wrap your roving around your core that you are wrapping in a figure eight motion.
4. When you start the second roving section, lay the end of the roving so that it is perpendicular to the roving under it. We want the roving to be laying in all directions so that the fibers will felt well.
5. Once you have a wool ball that is about 6” to 8” in diameter, it is time to felt it.
6. Lay the ball on your bubble wrap near the kitchen sink. Fill the sink about ¼ of the way up with the hottest water you can stand. Dribble water all over your wool ball—you don’t want to saturate it, just get it nice and wet.
7. Cover your ball with the piece of tulle netting and pump a bit of soap on your ball. Hold the netting down firmly with one hand, while rubbing the soaped area of your wool ball with the other in small circles using a bit of pressure. Turn your ball and repeat the action. If you ever feel like you are getting resistance, add more soap and water.
8. Keep turning your ball to felt the whole surface and to keep it round.
9. Once your ball is starting to felt (you can tell this because the wool won’t stick to the netting at all when you peel it away), you can roll it with your whole hand. Use a lot of pressure and make sure you keep moving your ball so that it doesn’t flatten out on one side.
10. Dip the ball in the hot water occasionally and squeeze the excess water out. If you have a piece of wool that isn’t sticking down to the ball simply squirt some soap on it, add a bit of hot water, place the netting over it and rub until it complies. If it still doesn’t felt, lay a bit more roving over it and felt the new roving around the area.
When your ball is felted it will be rather dense and stiff. Rinse it out well.
I recommend using four or five balls per load of laundry for best results. You can put a couple of drops of essential oil on your wool balls to add some fragrance to your laundry as well. If your static cling isn’t going away completely, try pinning a safety pin to one of your balls or spritz the wool ball with water or a bit of white vinegar before putting them in the dryer.
A group of wool balls in a glass container with a ribbon around it makes a great gift for someone you love, too. Happy creating!
Jennifer Carson is a local author and artist who enjoys creating beautiful items for home and family including: cards, stickers, wool candle rugs, bags, quilts, Waldorf dolls, stuffed animals, and more! You can see more of her work and peruse the over 60 available crafting patterns on her website thedragoncharmer.com.


I don’t know about you, but I am constantly misplacing my sunglasses in my bag. I eventually find them, and inevitably the lenses are scratched. I’m determined not to let this happen this summer, so I made a cute little glasses case to help protect them. I made this case on my machine, but you could hand sew it as well.