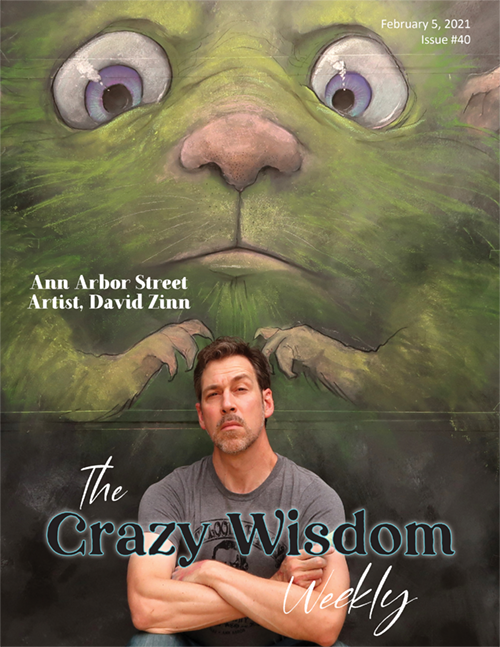
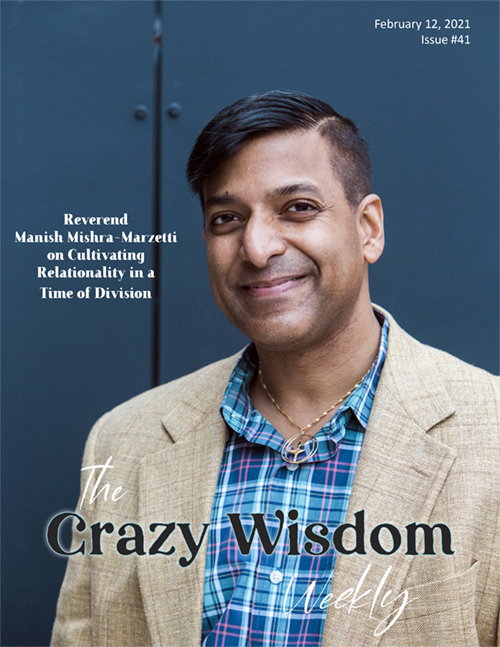
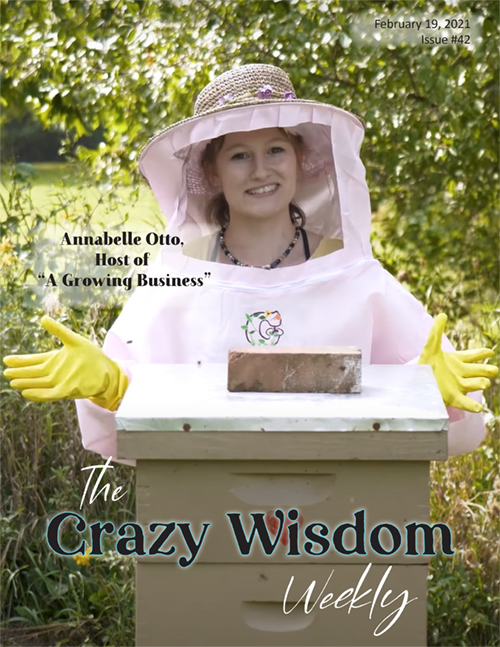
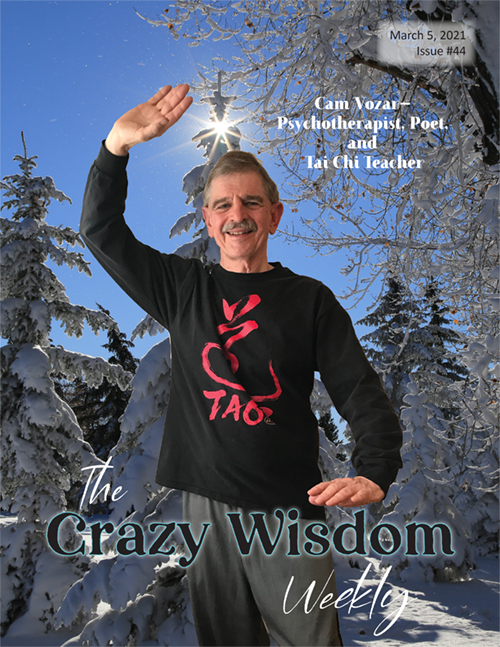
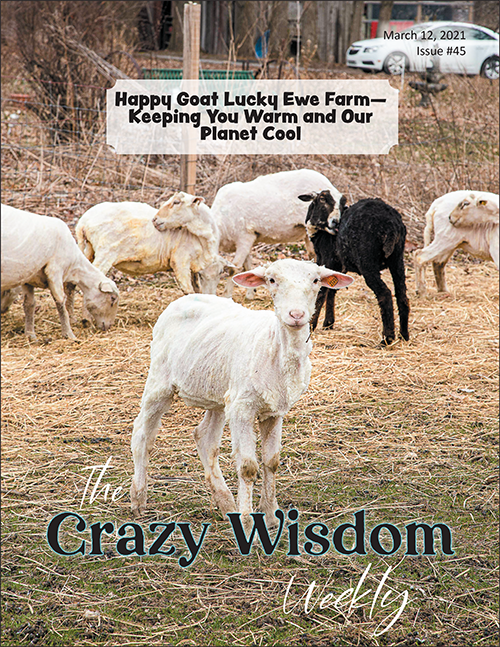
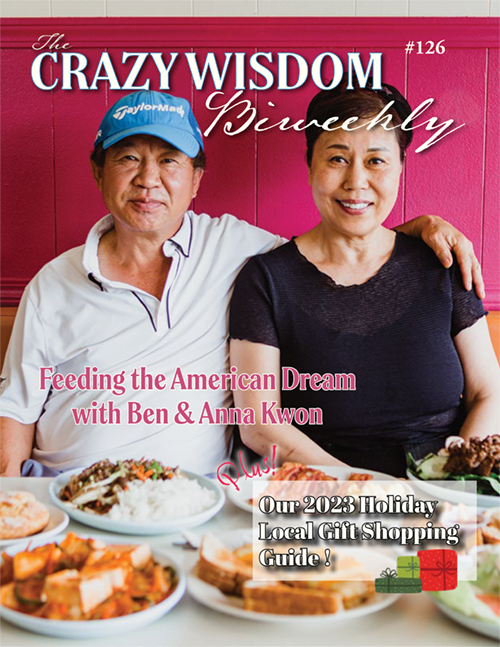
By Jennifer Carson
Bring a little magic into your holiday season with this jolly old elf. Made from scraps of wool felt and a bit of ribbon from your stash, he’ll be adorable hanging from your Yule tree, decorating a package, or pinned to your lapel.
Materials needed:
Wool felt in colors: red and skin tone of choice
Embroidery floss to match hat and skin tone, plus white and black
Embroidery needle
Scissors
Wool stuffing
Two tiny, black seed beads
Scrap of ribbon, lace, or other adornment
Curly mohair locks, or other fibers for hair, beard, and moustache
Pink colored pencil or blush
Pin back, buttons, jingle bells, or other adornment as desired
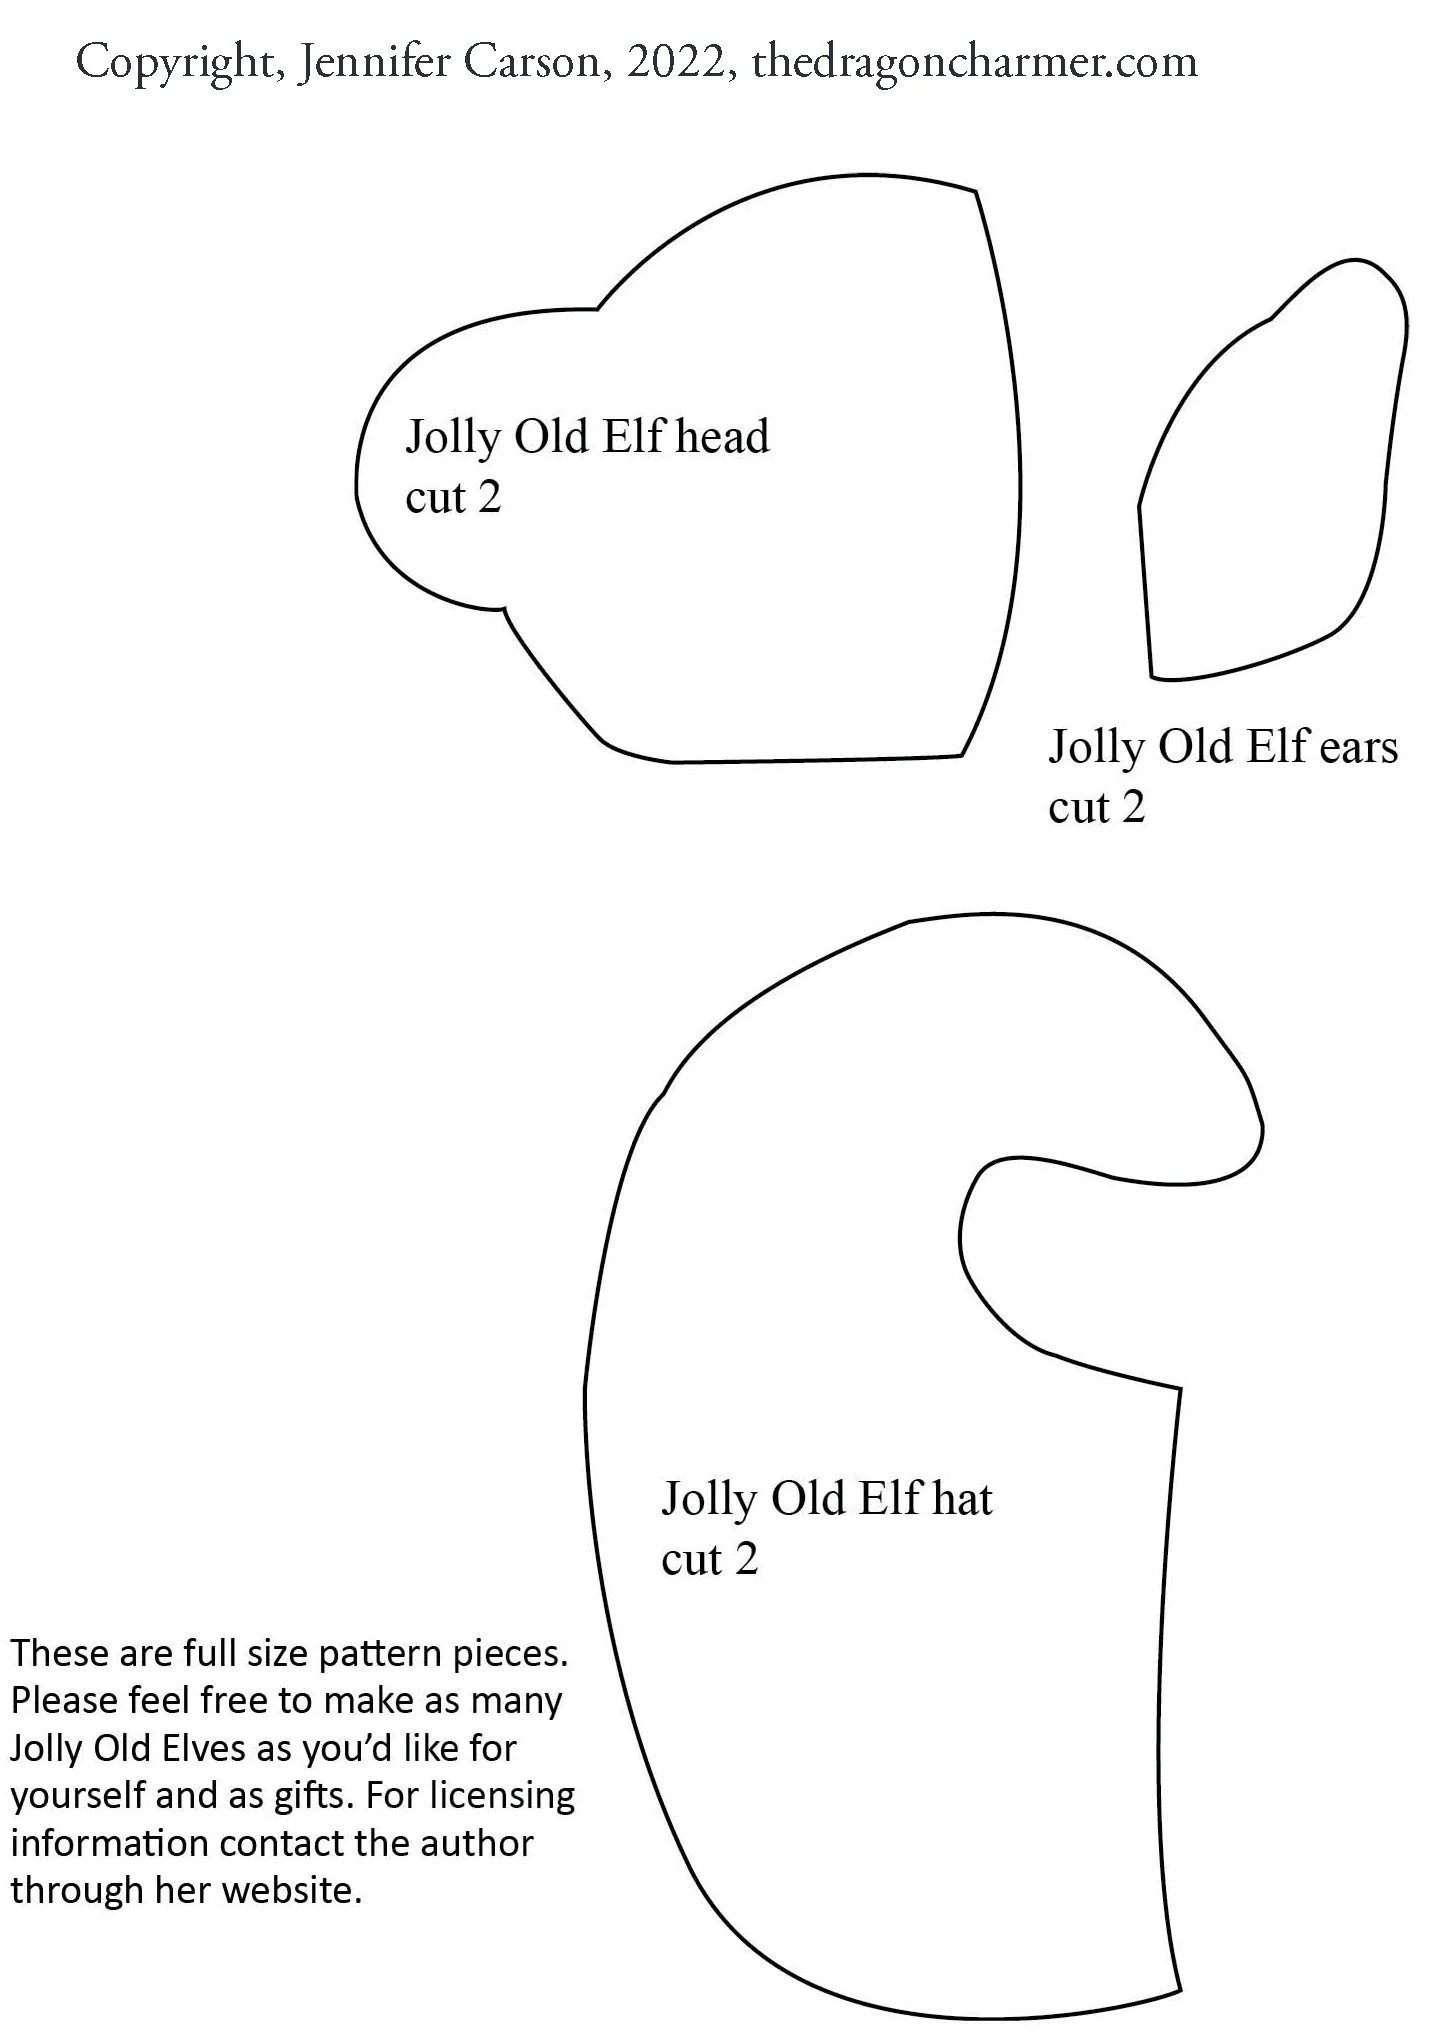
To get started, trace the pattern pieces onto freezer paper. With a warm iron, press your pattern pieces onto the wool felt. Cut the pieces out of the wool felt, then repeat the process so that you have two head pieces, two ears, and two hat pieces. Mark the eye placement, noted by the dot on the pattern piece, lightly with a pencil.

Match your head pieces together and pin in place. With your needle threaded with two strands of embroidery floss that matches your skin tone choice, stitch the pieces together with a tiny blanket stitch following the diagram.
Knot your thread well, but don’t cut it.
Stuff your head with wool stuffing. If you don’t have wool stuffing, regular fiberfill will work, too. Stuff his nose well!
Gather the edge of the now stuffed head piece. Add more stuffing if needed to make the head full. Gently pull the gathers tight so that the head closes. Tie off and bury your thread end.
We are going to give the face a little dimension by putting in a few stitches.

Starting at the back of the head, push your needle through the head and exit at the right nostril. Reinsert your needle and exit out back of head, pull gently. Repeat if you need/want more indentation. Do the same for the left nostril.
When both nostrils are indented, push your needle back into the nostril, and exit just a little above to make the side of the nose. Move your needle over just a bit toward the outside of the head and reinsert and exit out the nostril. Do this stitch 2 to 3 more times, then repeat for the other side. Knot your thread at back of head.
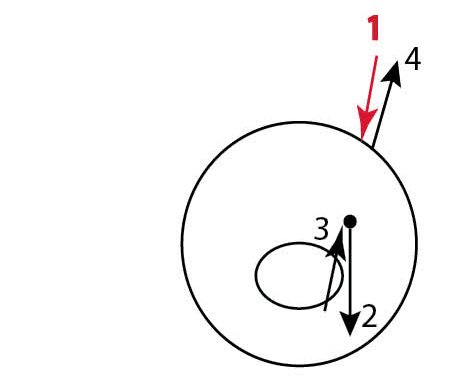
To indent eyes, anchor your thread in the back of head, insert needle through back of head and exit at eye. Move your needle over just a bit (you want to keep your stitches very close together!) and exit out the back of head. Pull gently and repeat. When you are happy with the indentation, repeat for other eye. Knot your thread at back of head.
Sew your eyes in the indentations you just made with two strands of black thread and tiny seed beads.
Fold the top edge of the ear over just a bit to create a small “fold.” Pin ears to head and stitch in place with matching thread.
With white embroidery floss, stitch eyebrows and sew pieces of curly locks under his nose. I also sewed a lock of hair onto the top of his head.
Use your colored pencil, or some blush, to brighten his cheeks.
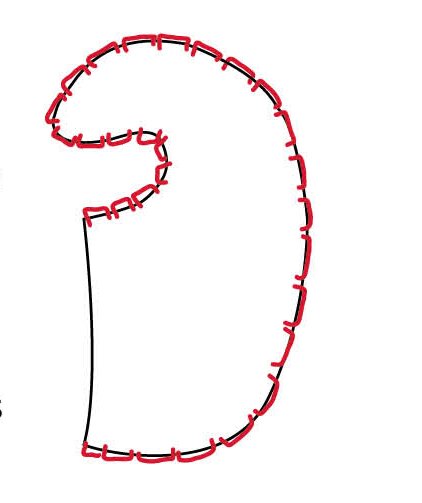
Sew the hat with a tiny blanket stitch as shown on diagram to the right. Don’t cut thread, yet.
Place hat on your elf (over his ears). You’ll need to cut a line from the edge of the hat to where the top of the ear is—it might take a little trying on, snipping, and then trying on again to get it right.
Pull his ears through, adjust the narrow strip in front of ears until you like the fit. At the bottom of the head, whipstitch the two pieces of the strips together. Then with a tiny blanket stitch, sew hat around face. Knot thread and bury end when finished.

Sew on any embellishments you’d like! Add a pin to the back of his hat to make a wearable piece of art or put a hanging string in the curve of his hat to hang in your Yule tree. I hope you enjoyed making your very own jolly elf.
Jennifer Carson is a local author and artist who enjoys creating whimsical art for home and family. You can see more of her work and peruse all of her crafting patterns at thedragoncharmer.com.
Related content:


Autumn is the season of bounty, and it’s so easy to end up coming home after a wander into the natural spaces around us with pocket loads of natural treasures. Why not engage in some creative crafting with your harvest? Here are a few of my favorite autumn wild crafts to make the most of your gathering.