
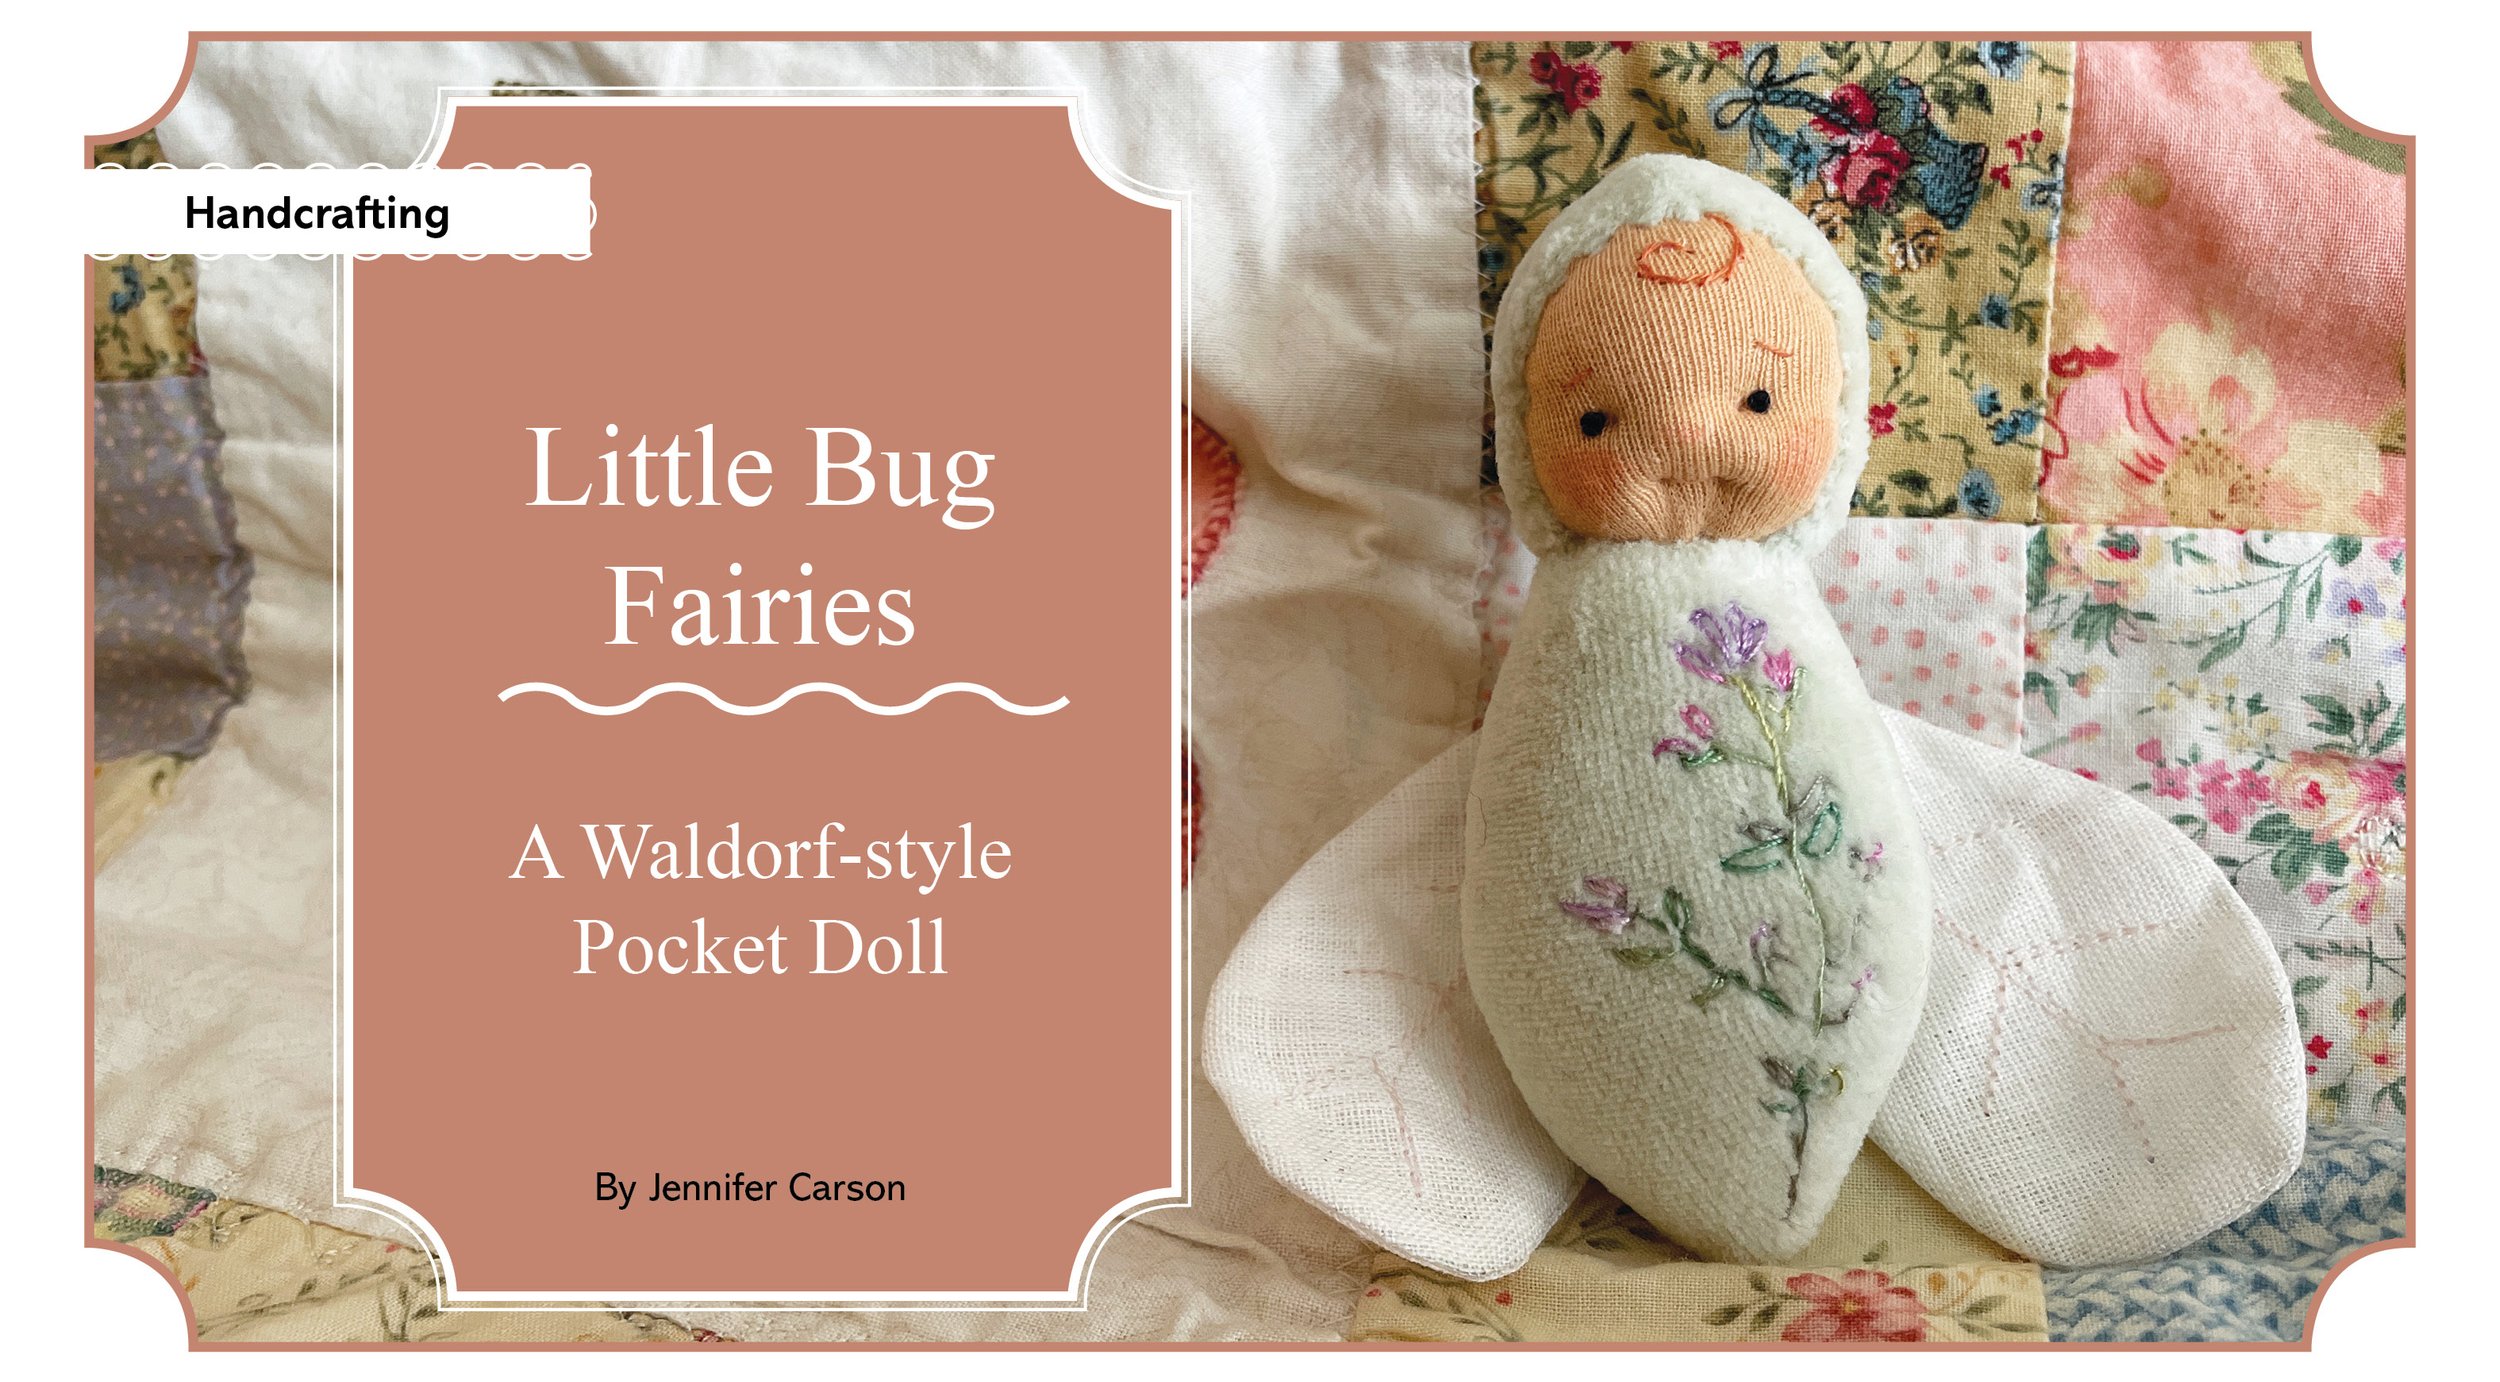
By Jennifer Carson
Spring brings showers, flowers, and faeries back into our gardens! These cute Little Bug Faeries are great for entertaining little ones during story time, while riding in a car, or waiting to see the doctor. They are so easy to make, you’ll find yourself making one in every color of the rainbow!
Materials Needed:
6” square of cotton velour
4” square of linen or other wing material
3x4” square of cotton interlock knit
Wool stuffing
Embroidery floss for eyes, nose, mouth, hair, flowers
Heat erasable pen
Strong binding thread
Fabric glue or Fray Check
Basic sewing supplies (hand or machine)
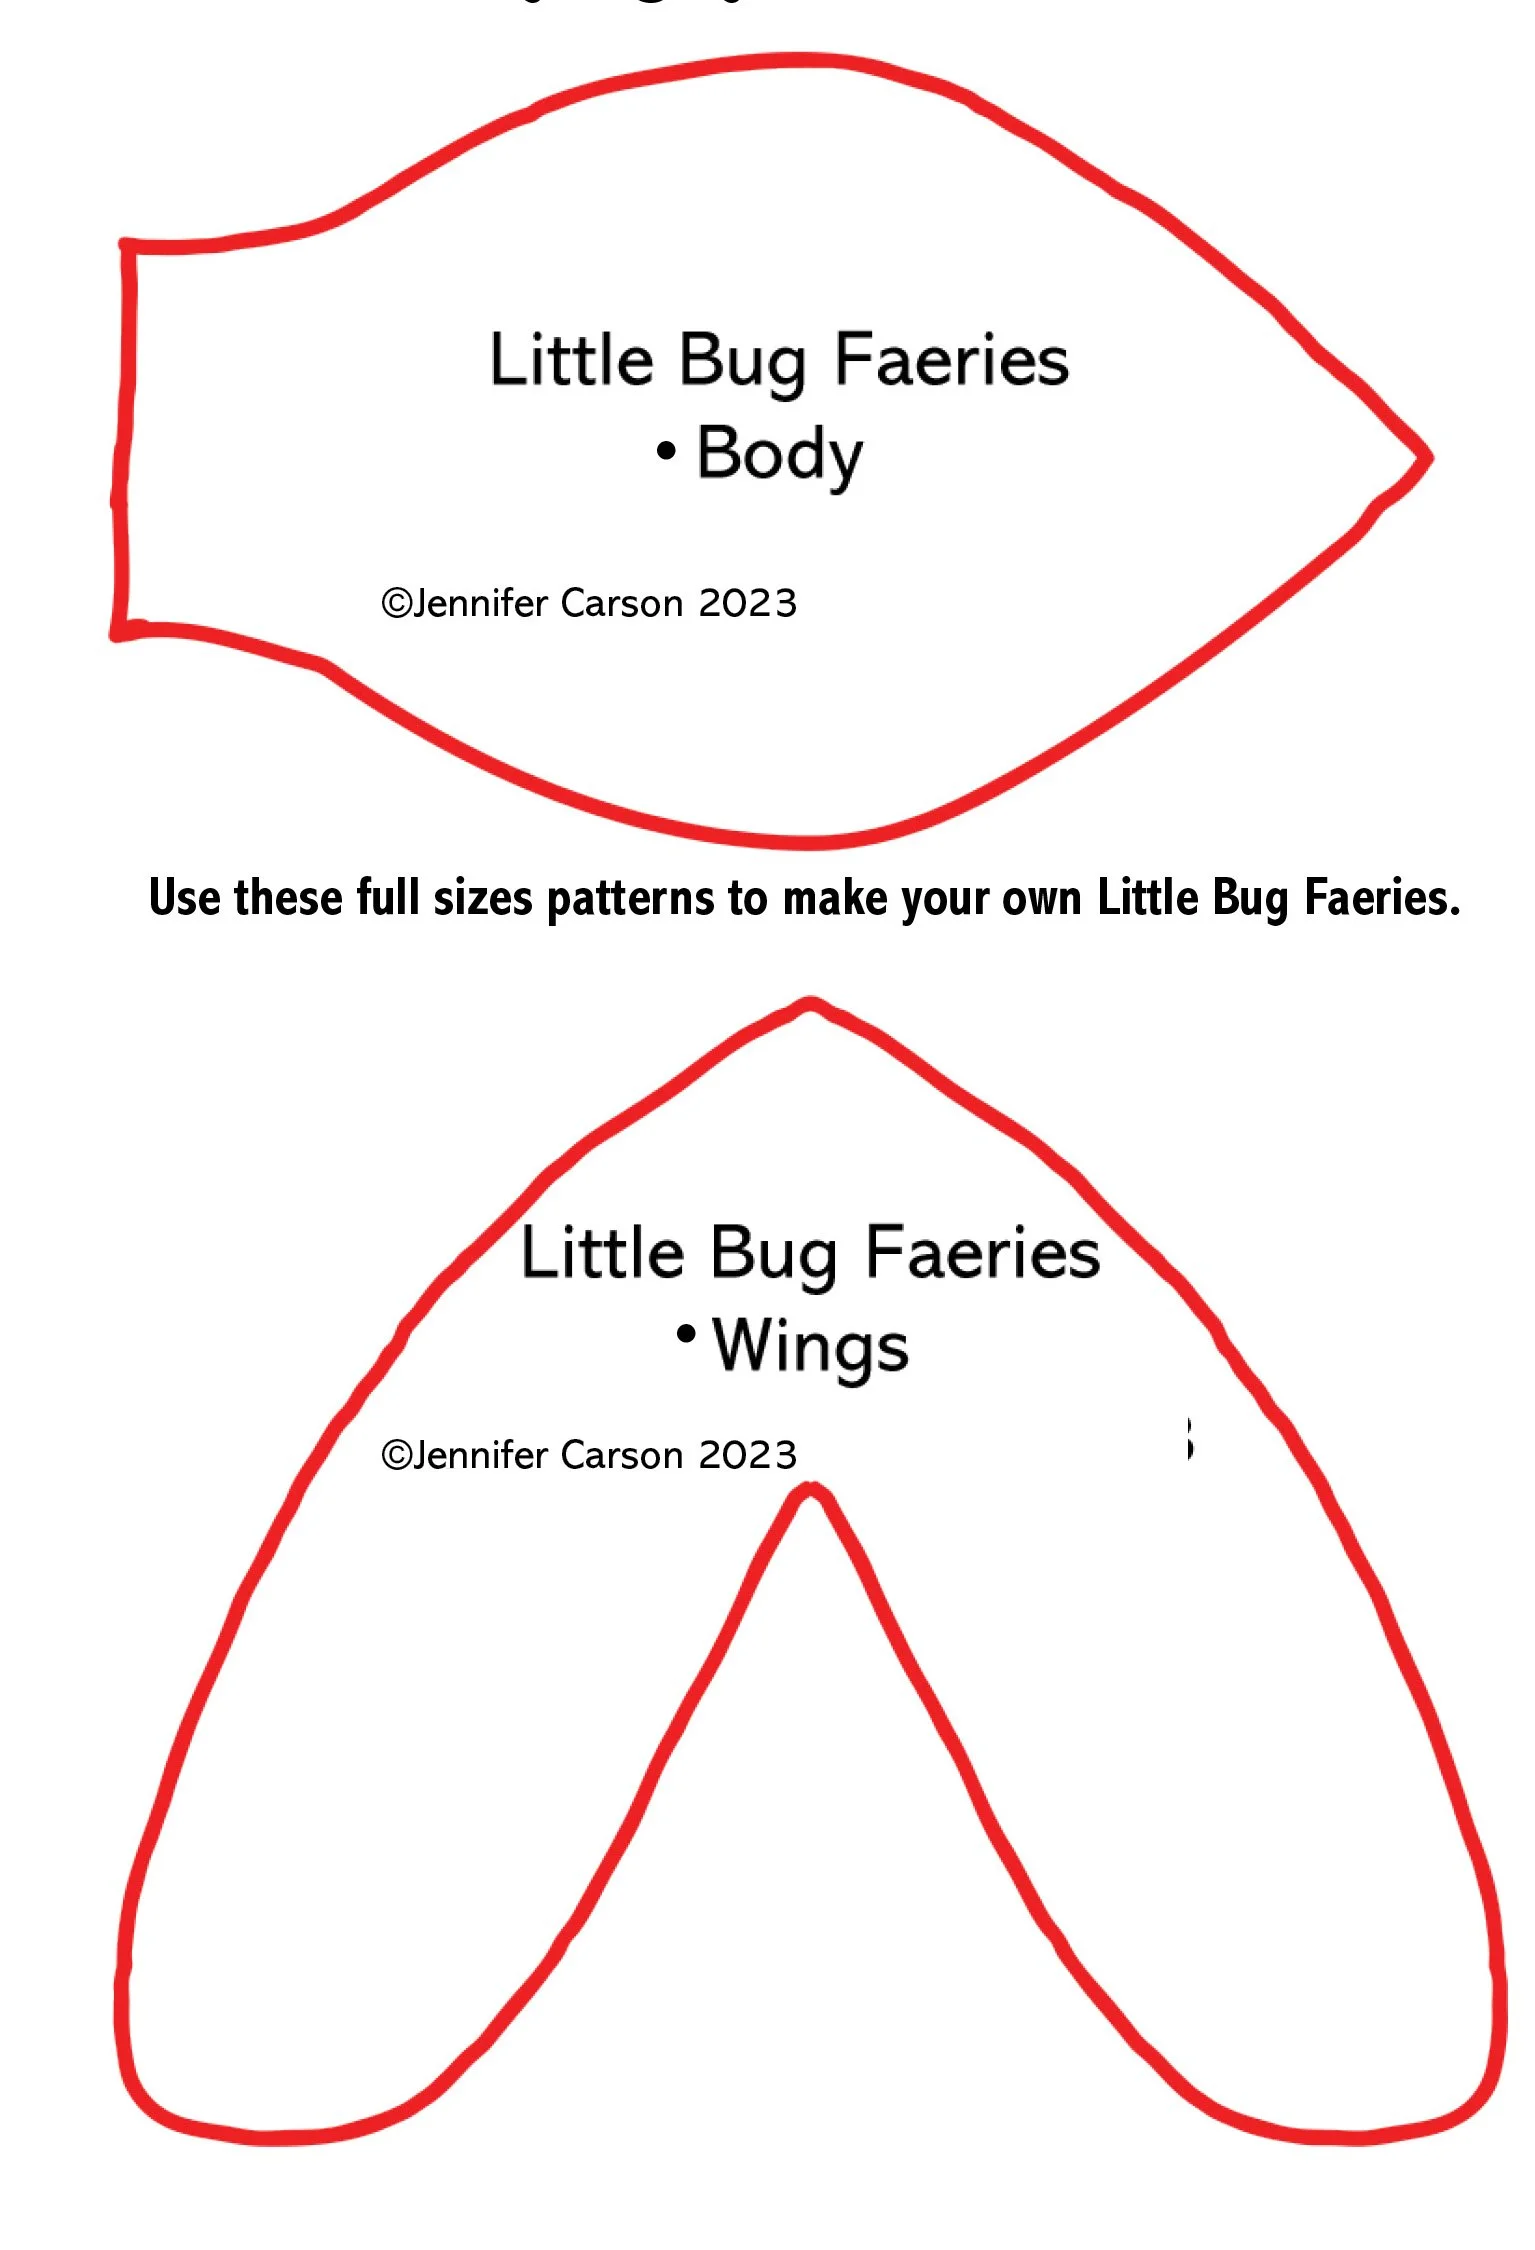
To begin, fold your linen square in half. Trace the wing pattern onto the fabric. Stitch right on the outline of your wings. Cut a slit in the wings and turn them right side out. Dab some fabric glue or Fray Check on your slit. Let dry then press with a warm iron.
Draw vein lines in your wings. Be creative! Topstitch the lines you drew. Press again to get rid of the drawn lines.
Fold your wings in half and stitch through all layers, very close to the fold. Set aside.


Trace the pattern for the body and the hood onto the wrong side of your cotton velour with your heat erasable marker. Make sure that the stretch goes across the body. Cut these two pieces out from your fabric.
Embroider the body with any decoration you choose. I embroidered flowers.
Fold the remaining cotton velour in half and cut a slit down the center. Insert the wings and pin. Stitch through all the layers so the wings are sewn in securely.
Pin the body pieces right sides of the fabric together, matching the centers. Stitch along the outside edge leaving a 1/8” seam allowance—being careful not to catch the wings in the seam. Cut out the body and turn right side out. Set aside.
Fold your 3x4” cotton knit rectangle in half. Stitch the long edge with a 3/8” seam and one short edge. Trim seam allowance down to about 1/4”. Turn right side out.
If you know how to make a Waldorf head, make a head that measures about 3 to 3-1/2” in circumference. If you don’t know how, it’s okay! Just wind a wool ball until it’s about 3” in circumference. Then pull three strips of roving that are about 4” long and make a star. Place your wool ball into the center and pull the star’s “legs” down over the ball. Insert into your cotton knit tube.
With a strong thread, tie your tubing under the wool ball.
Embroider the eyes using French knots and three strands of floss. For the eyebrows, hair, and mouth, use one strand of floss. Use two strands for the nose. Add some color to your fairie’s cheeks with a Prismacolor pencil, blush, or rouge crayon.
Stuff your fairie’s body with wool stuffing. Insert the head. Add more stuffing if needed. With a ladder stitch and strong thread, attach the head to the body.
Fold the hood in half with right sides together. Stitch the back seam and turn right side out. Place the hood on your fairie’s head. Stitch the hood to the body with a ladder stitch. Stitch the hood around the face using a tiny blanket stitch, or blind stitch.
Jennifer Carson is a local author and artist who enjoys creating whimsical art for the home and family. You can see over 70 sewing patterns, her books for kids, and other art on her website, thedragfoncharmer.com or furandfeatherfriends.com. Follow her on instagram @magickalJennCarson_art.


I don’t know about you, but I am constantly misplacing my sunglasses in my bag. I eventually find them, and inevitably the lenses are scratched. I’m determined not to let this happen this summer, so I made a cute little glasses case to help protect them. I made this case on my machine, but you could hand sew it as well.