

By Jennifer Carson
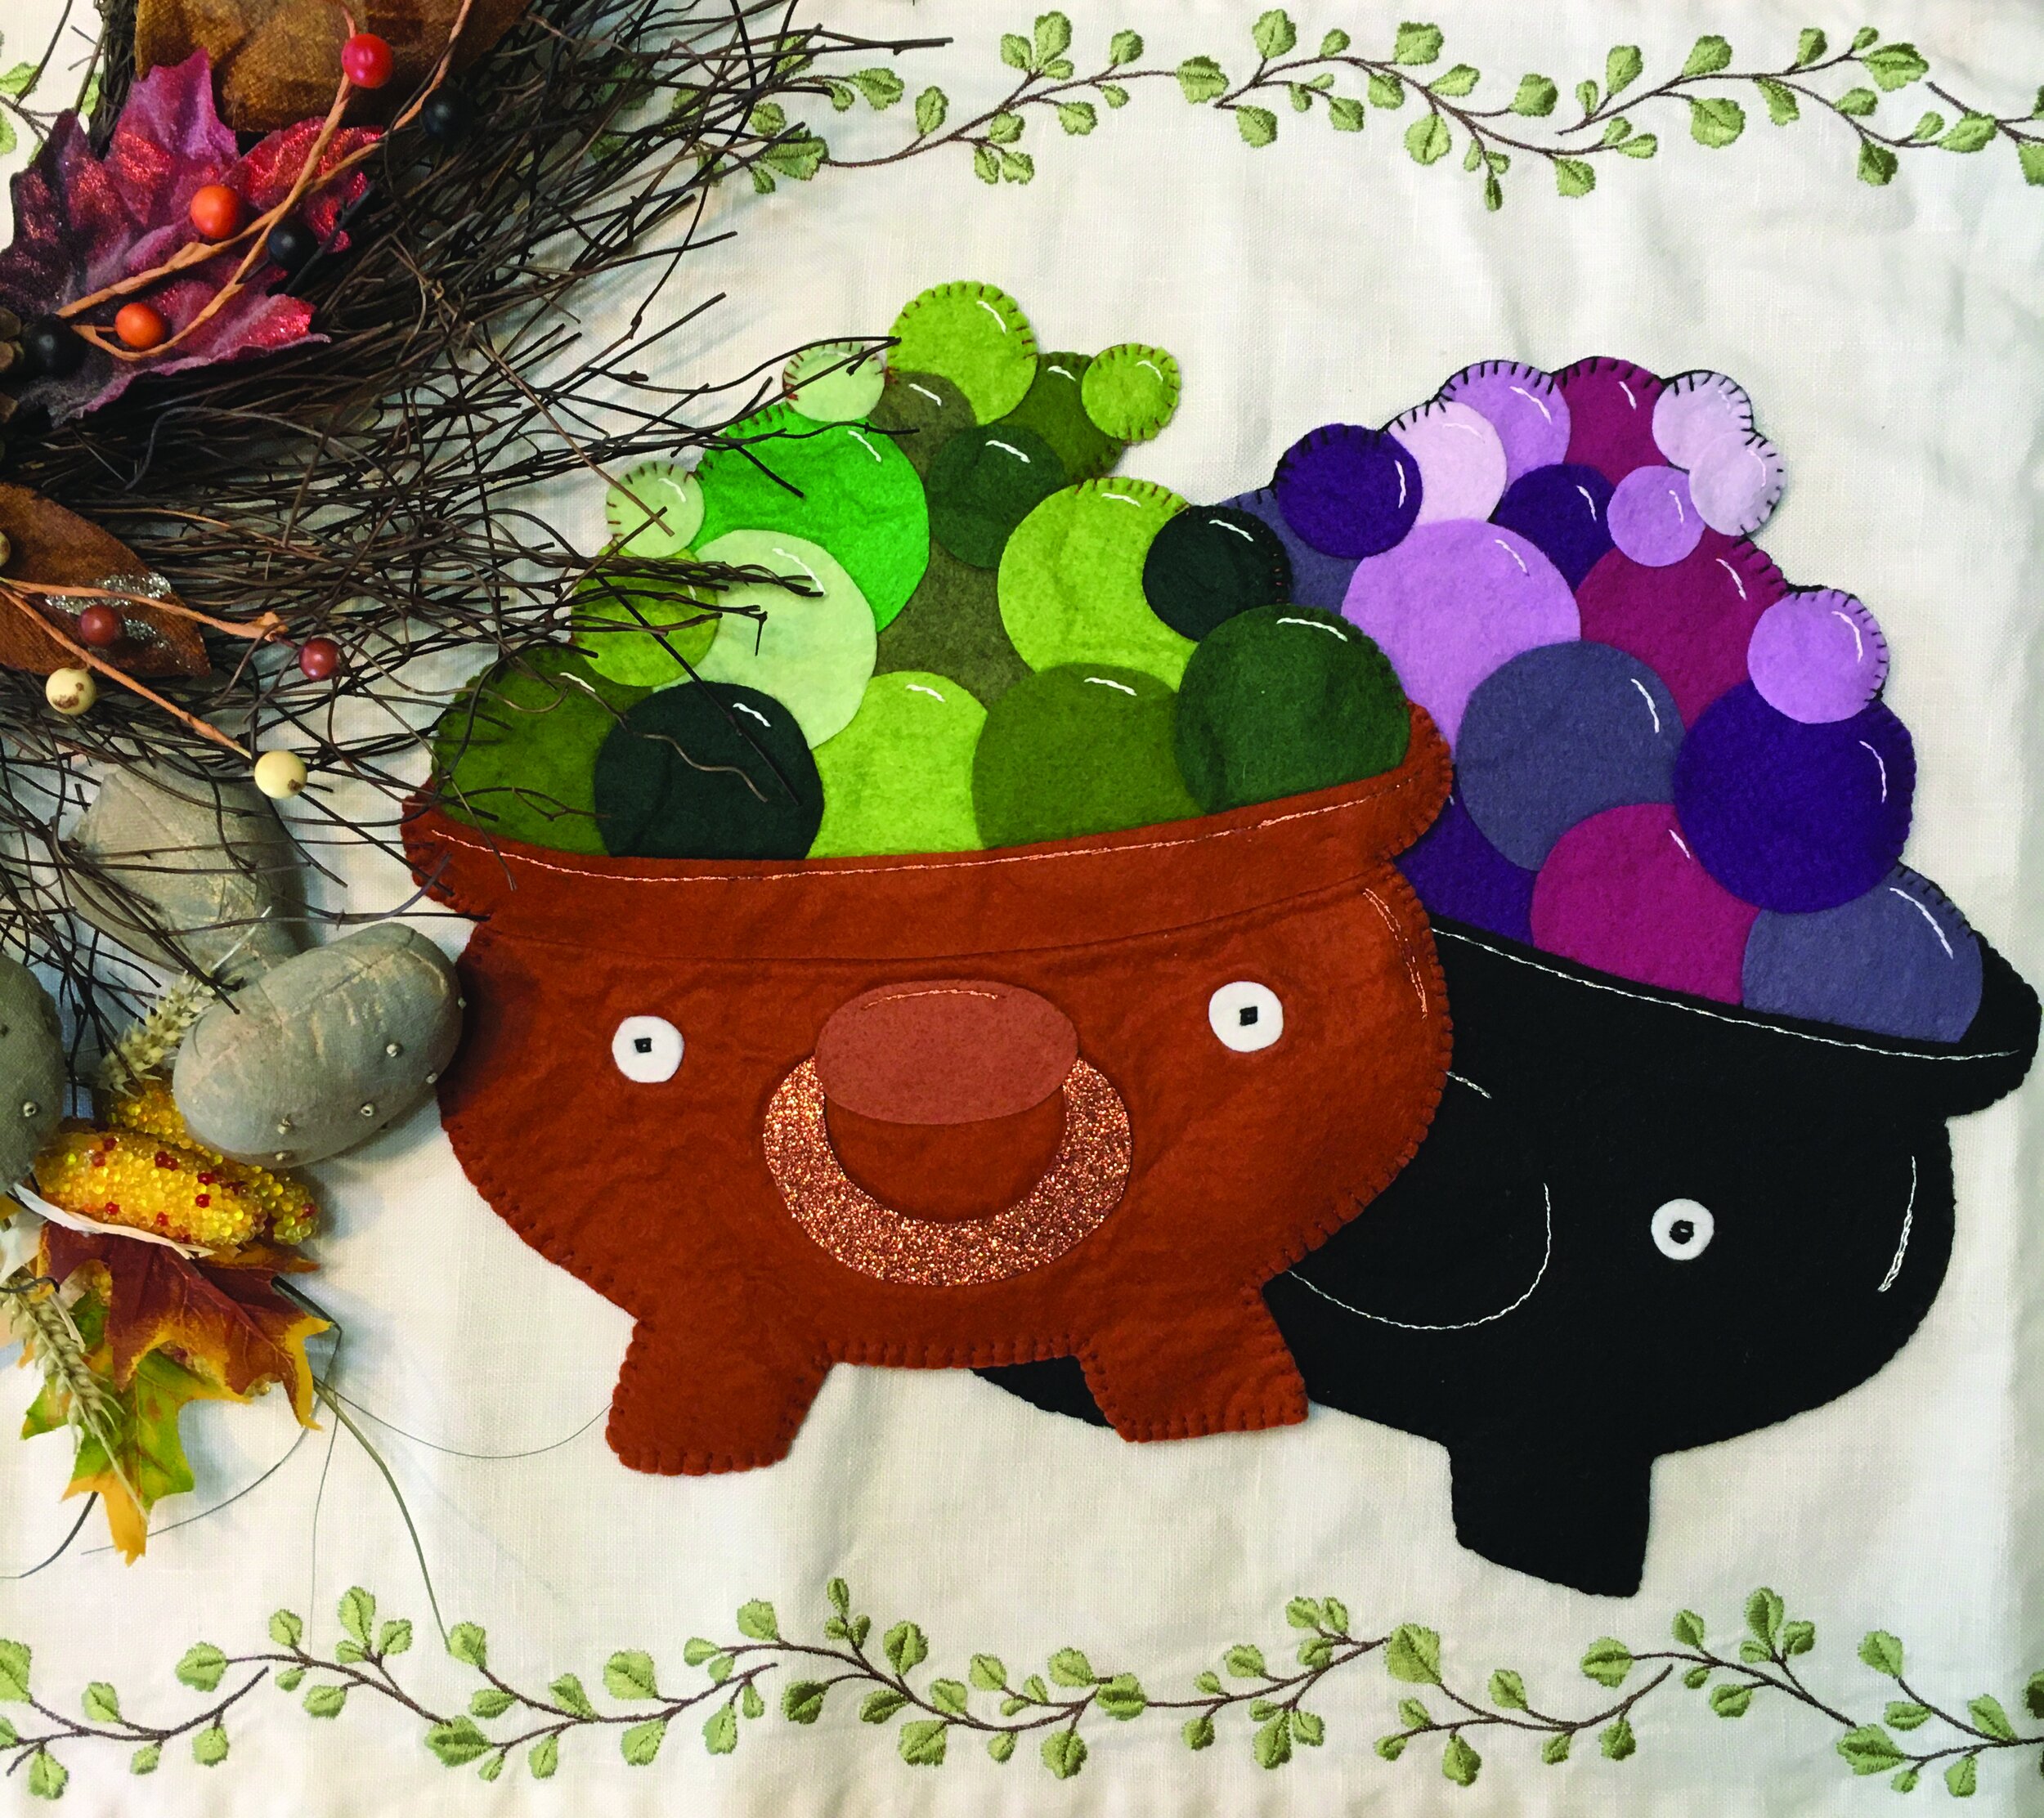
Bring a little whimsy to your holiday table with this cute hot pad for your special Samhain dishes. Easy to make with wool felt, a few hand-stitches, and a warm iron. The pattern will be available for printing online September 1. Visit crazywisdom.com and click on the featured stories and columns.
Ingredients for your own cauldron:
12” x 24” piece of wool felt in your choice of color for cauldron
Assorted wool in your choice of colors for bubbles
A scrap piece of white wool felt for eyes
12” x 12” piece of Insul-Bright
½ yard of Heat and Bond
Embroidery floss: Metallic that compliments cauldron color, white, and black
Embroidery needle
Scissors
Iron
Printed pattern pieces. Download pattern file here.

To begin, trace each pattern piece onto the paper side of the Heat and Bond. You will need to trace 9 large bubbles, 6 medium bubbles, and 3 small bubbles.
Cut these pieces out close to, but not on, the line.

With a warm iron, iron your wool felt to make sure there aren’t any creases in it, then iron on your pattern pieces to the corresponding colors. Cut your pieces out on the line and peel off the paper backing.
On your square of Insul-Bright, layout your cauldron base. Then start layering your bubbles. Make sure you don’t go below the rim of your cauldron! When you are happy with the arrangement of bubbles in your cauldron place your cauldron rim on top and line up with edge of cauldron on the right and left sides. Adjust any bubbles that are peeking out below the rim, if needed.
Carefully iron down your bubble and rim pieces.
Now arrange your “nose,” handle, and eyes, and iron those pieces down.
Cut out your cauldron from the Insul-Bright.
Embroider the highlights on the bubbles with 2 strands of white floss using a backstitch.
Use metallic floss to highlight the top of the rim, side of cauldron, top of nose, and handle.

Layer your cauldron full of bubbles (already ironed onto your Insul-Bright) on top of your remaining wool felt. Pin well so that it doesn’t shift and cut out the shape for your backing. Alternately, you could trace your shape onto the Heat and Bond and cut out the shape 1/8” inside the edge. Iron that onto the back of your shape, and then iron on to your wool felt, and then cut out the whole shape.

To finish, use two strands of floss and a blanket stitch the close the edges.
Jennifer Carson is a local author and artist who likes to make fun and whimsical toys, accessories, décor, and illustrations for the home. You can check out her work and over 60 sewing patterns at thedragoncharmer.com.
Related Content:


Spring brings showers, flowers, and faeries back into our gardens! These cute Little Bug Faeries are great for entertaining little ones during story time, while riding in a car, or waiting to see the doctor. They are so easy to make, you’ll find yourself making one in every color of the rainbow!